Add "Sign in with Examplary" to your application and let users authenticate using their Examplary account. You can then access the Examplary API on behalf of your users with their permission.
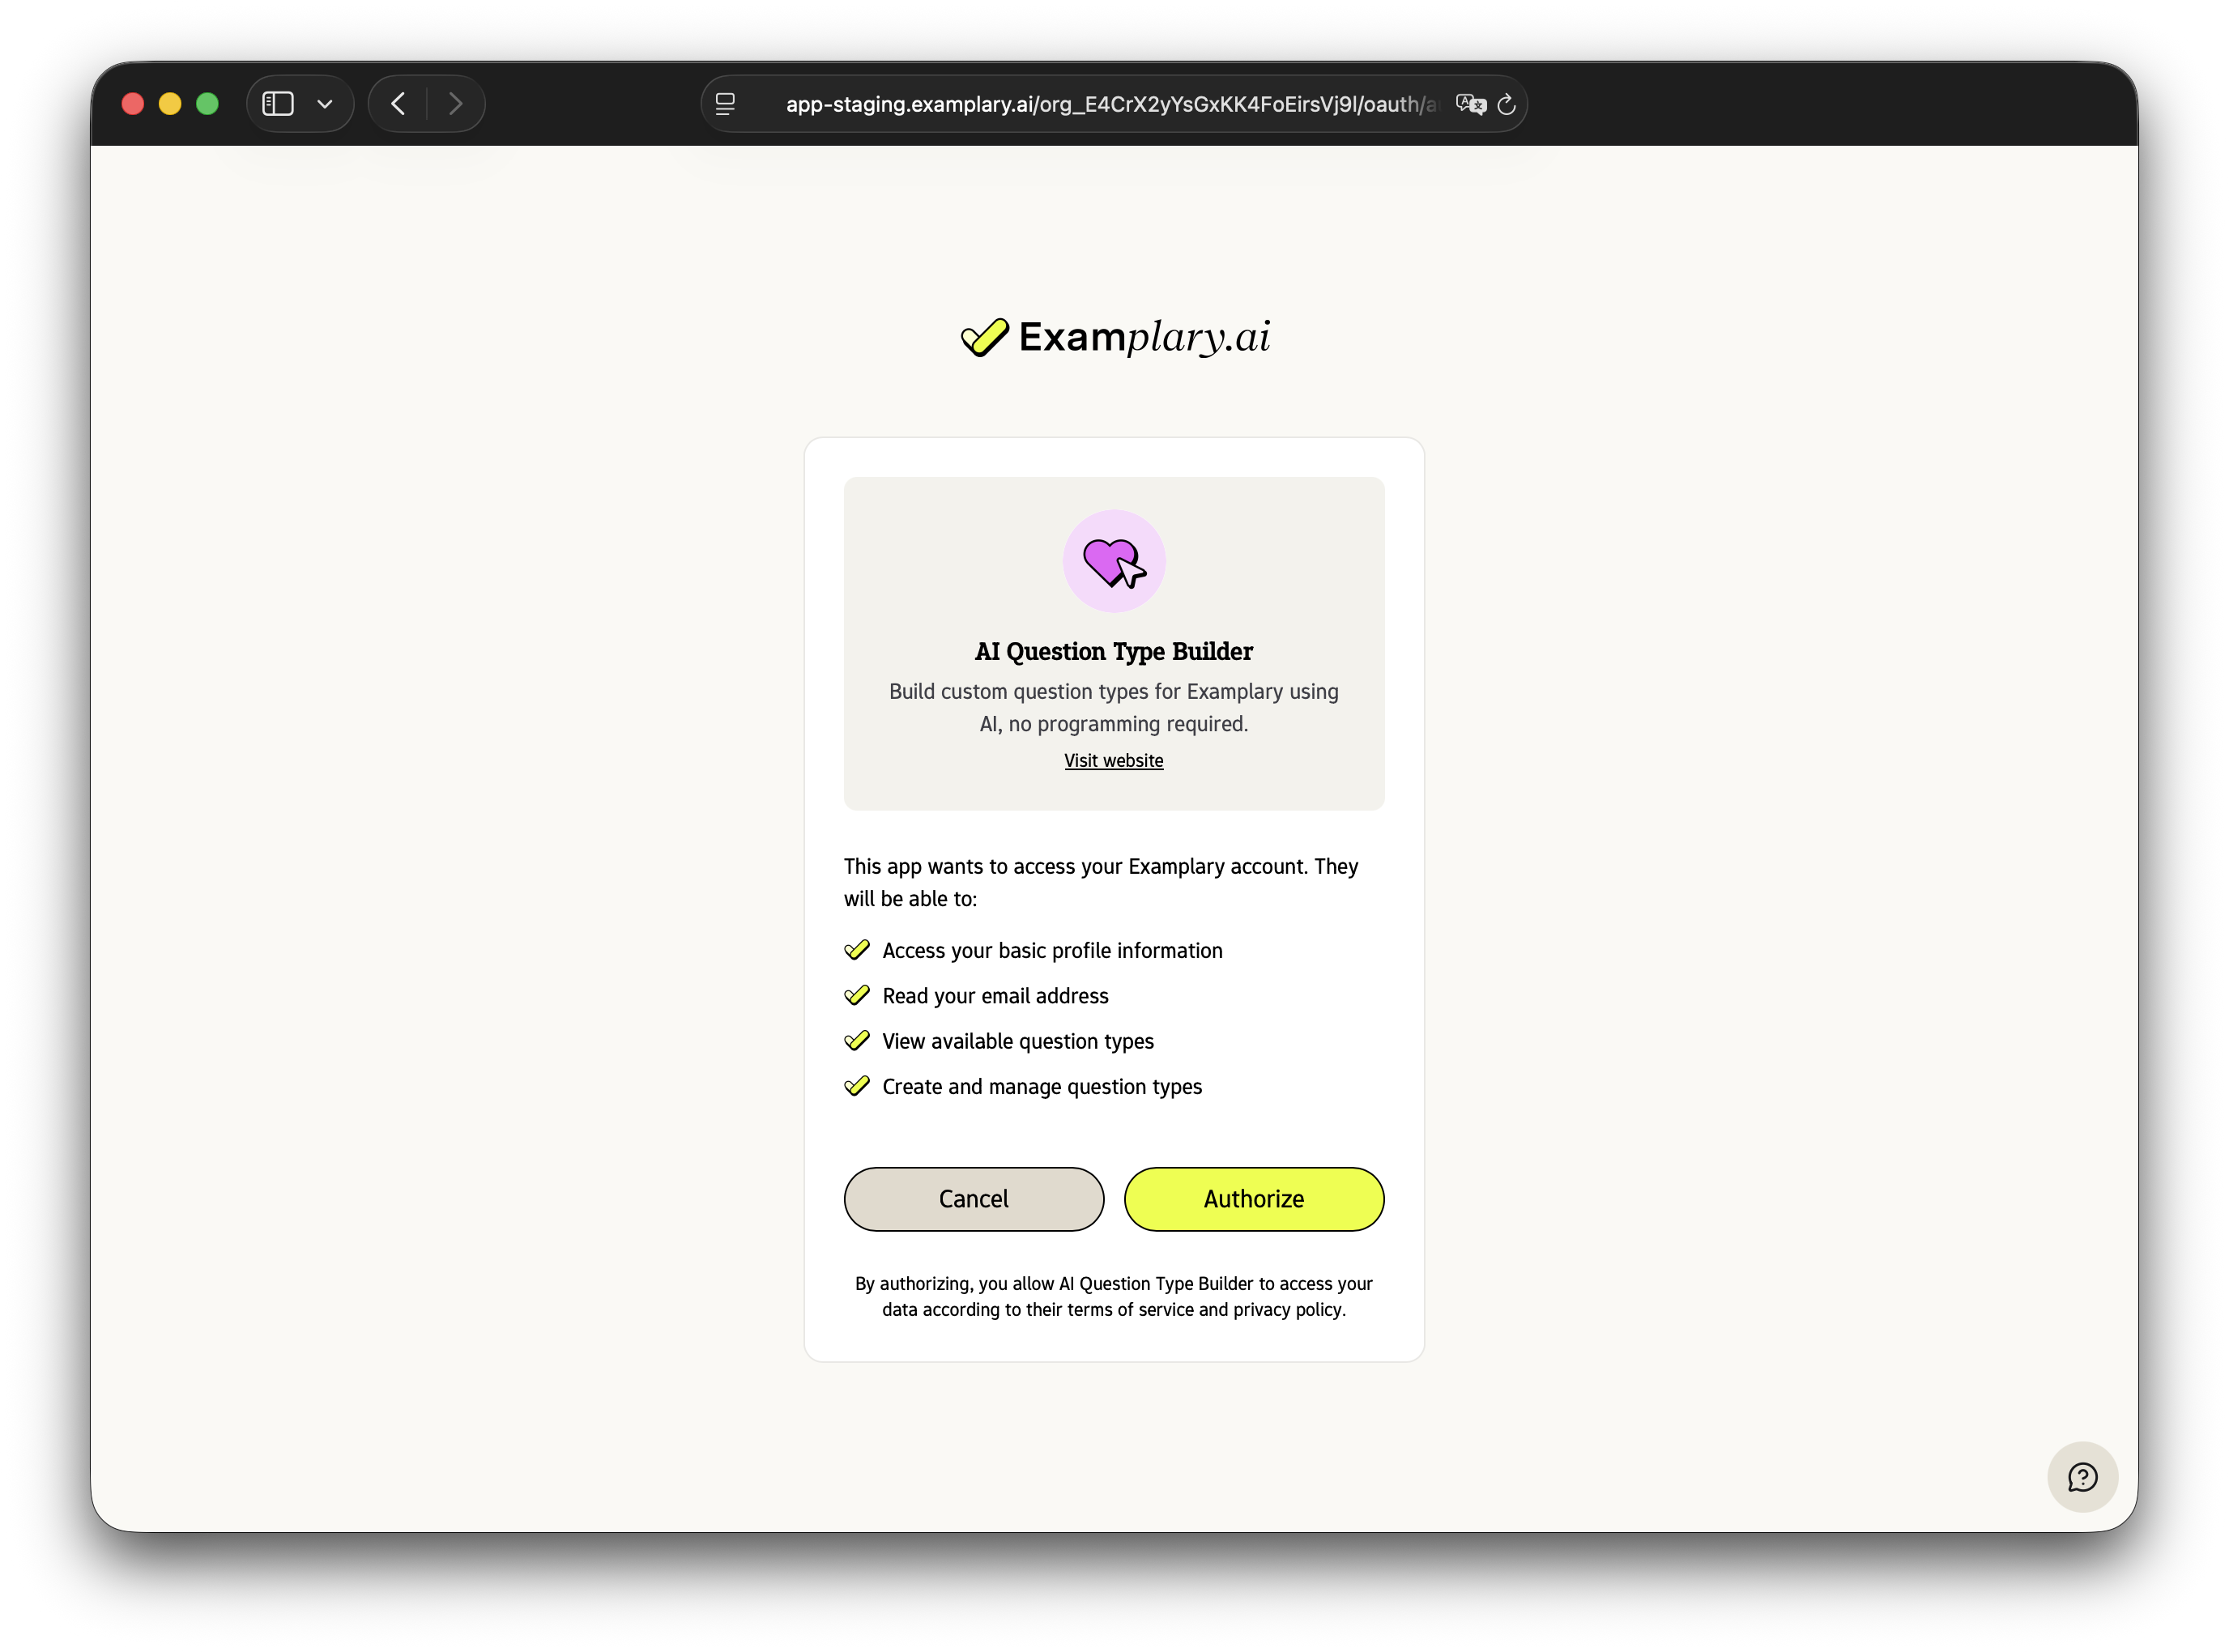
Examplary supports OAuth 2.0 with the Authorization Code flow, with PKCE for enhanced security, and OpenID Connect for user authentication.
Register your application
Before you can integrate OAuth, you need to register your application with Examplary:
- Sign in to your Examplary account and navigate to Account → Developer → Manage OAuth clients
- Click Create Client and fill in your application details:
- Name: Your application name (shown to users during authorization)
- Description: A brief description of what your app does
- Redirect URIs: The callback URLs where users will be redirected after authorization (one per line)
- Click Save and copy your Client Secret — this is shown only once!
- Store both your Client ID and Client Secret securely
Scopes
openid, profile, and email are granted by default and only give you basic sign-in and profile information. To access a user's Examplary data (tests, folders, source materials, permissions, and so on), request the relevant resource scopes explicitly, e.g. exams:read, exams:write, folders:read, or practice-spaces:write. Most resources follow this resource:read / resource:write pattern. See the OAuth scopes reference for the full list of scopes and what each one grants.
You can fetch the full, up-to-date list of available scopes and their descriptions from:
GET https://api.examplary.ai/oauth/scopesThis endpoint requires no authentication and returns an object keyed by scope name, e.g.:
{
  "openid": { "description": "Authenticate using OpenID Connect", "default": true },
  "exams:read": { "description": "View your tests and questions", "default": false },
  "exams:write": { "description": "Update, and delete tests and questions", "default": false }
}
Request only the scopes your application needs — the user will see each requested scope on the authorization screen, and any scope not in the catalog causes the authorization request to fail with invalid_scope.
Implement the OAuth flow
Here's how to add "Sign in with Examplary" to your application:
1. Send users to authorize
When a user wants to sign in, redirect them to the authorization endpoint:
https://api.examplary.ai/oauth/authorize?response_type=code&client_id=YOUR_CLIENT_ID&redirect_uri=YOUR_REDIRECT_URI&scope=openid+profile+email&state=RANDOM_STATEParameters:
response_type: Alwayscodefor the authorization code flowclient_id: Your OAuth client IDredirect_uri: Where to send users after authorization (must match one of your registered URIs)scope: Space-separated list of scopes you're requestingstate: A random string to prevent CSRF attacks — verify this matches when the user returns
2. User authorizes your app
The user will see a screen asking them to approve or deny access to your application. They'll see which permissions (scopes) you're requesting.
3. Handle the callback
After the user authorizes your app, they'll be redirected back to your redirect_uri with a code:
https://your-app.com/callback?code=oauth_code_abc123&state=RANDOM_STATEVerify that the state parameter matches what you sent in step 1.
If the user denies access instead, there's no code — you'll get an error back on the same redirect:
https://your-app.com/callback?error=access_denied&error_description=User+denied+authorization&state=RANDOM_STATE4. Exchange the code for tokens
Make a POST request to exchange the authorization code for an access token:
curl -X POST https://api.examplary.ai/oauth/token \
  -H "Content-Type: application/json" \
  -d '{
    "grant_type": "authorization_code",
    "code": "oauth_code_abc123",
    "redirect_uri": "https://your-app.com/callback",
    "client_id": "oauth_client_xyz",
    "client_secret": "oauth_secret_xyz"
  }'
You'll receive a response like this:
{
  "access_token": "expacc_xyz123",
  "token_type": "Bearer",
  "expires_in": 86400,
  "refresh_token": "expref_abc456",
  "scope": "openid profile email",
  "user_id": "user_789",
  "org_id": "org_456",
  "id_token": "eyJhbGciOiJIUzI1NiIsInR5cCI6IkpXVCJ9..."
}- access_token: Use this to make API requests (valid for 24 hours)
- refresh_token: Use this to get a new access token when it expires (valid for 1 year)
- id_token: JWT containing user information (only included if you requested the
openidscope), valid for 1 hour — independent of the access token's expiry - user_id and org_id: Identifiers for the authenticated user and their organization
5. Make API requests
Include the access token in the Authorization header when making API requests:
curl https://api.examplary.ai/me \
  -H "Authorization: Bearer expacc_xyz123"
6. Refresh expired tokens
When your access token expires, use the refresh token to get a new one:
curl -X POST https://api.examplary.ai/oauth/token \
  -H "Content-Type: application/json" \
  -d '{
    "grant_type": "refresh_token",
    "refresh_token": "expref_abc456",
    "client_id": "oauth_client_xyz",
    "client_secret": "oauth_secret_xyz"
  }'
Refresh tokens are rotated on use: the response includes a new access_token and a new refresh_token, and the one you just used is revoked immediately. Store the new refresh_token and discard the old one — reusing a refresh token after it's been exchanged returns invalid_grant.
Revoking tokens
Your application should revoke a user's tokens when they disconnect your integration, by making a POST request to the revoke endpoint:
curl -X POST https://api.examplary.ai/oauth/revoke \
  -H "Content-Type: application/json" \
  -d '{
    "token": "expacc_xyz123",
    "token_type_hint": "access_token",
    "client_id": "oauth_client_xyz",
    "client_secret": "oauth_secret_xyz"
  }'
token can be either an access token or a refresh token — the endpoint tries both if you don't specify which. token_type_hint is optional; pass access_token or refresh_token to skip that guesswork.